
Overview
Use workflows to delete, rename, and reassociate attachments.
Features three (3) workflow actions:
- Attach Files
- Update Files
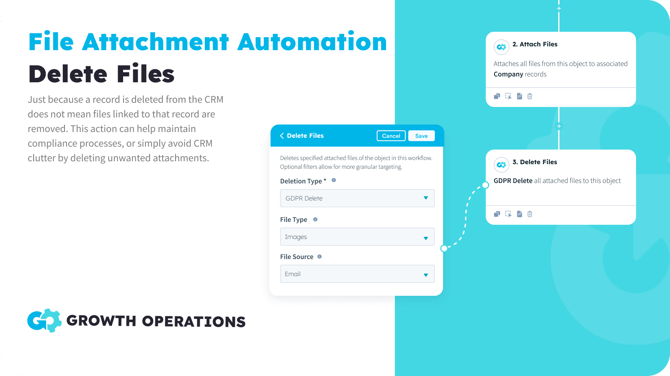
- Delete Files
Prerequisites
Before proceeding, make sure you have signed up for a Growth Operations account here. You’ll also need a HubSpot plan that includes workflows.
Installation
You can install the app by visiting app.growth-operations.com, selecting “Browse Apps”, and then the install button:

The next step is authorizing File Attachment Automation to HubSpot.
Authorization
On the authorization screen, click the “Connect” button to authorize HubSpot.

This will take you to hubspot.com to select your desired portal to connect to and to approve the necessary permissions.
See screenshots below.
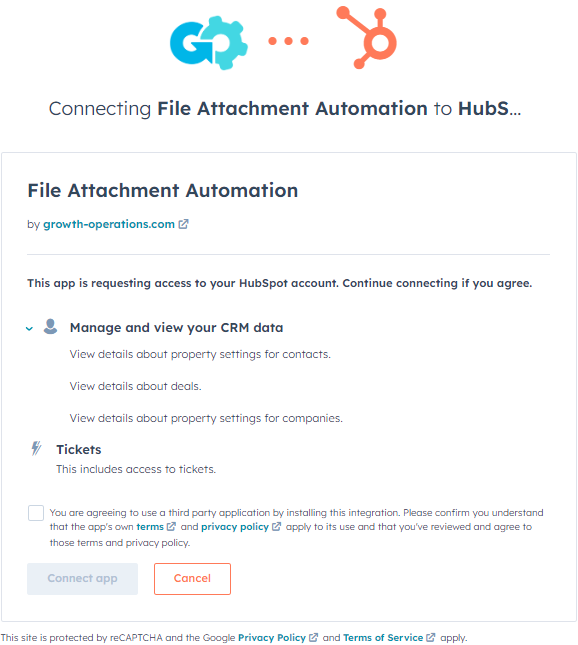
Once you are connected, the installation is complete!
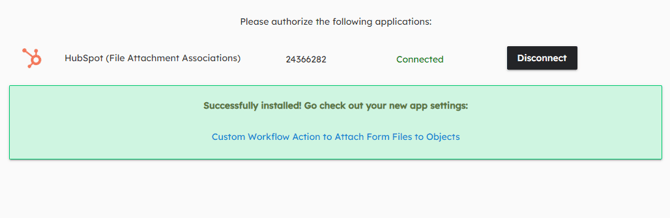
Usage
You can now use any of the custom workflows actions within your account.
These actions are available in any type of HubSpot workflow.
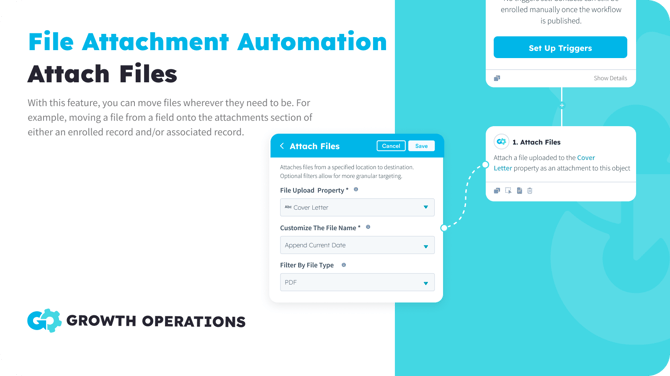
1. Attach FilesThis action allows you to search a file location and attach to a destination of your choosing. Locations you can pull from include the central File Manager, a file property on the enrolled record, or the attachments section of an enrolled record. Options on where you reattach the specified file(s) then include the destinations of a file property or attachments section on the same enrolled record, or the attachments section of an object that’s associated to the enrolled record. For the File Manager specifically, the most common use case here is a migration scenario. You are moving from another CRM instance, and want to load in all of your attachments to the correct records. With a matching key in the file name, this action enables you to do the rest.
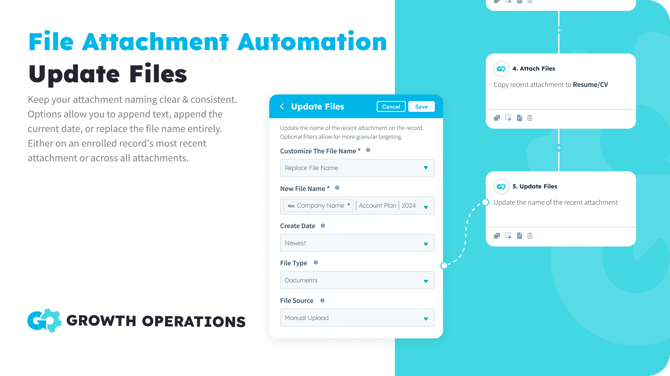
Keep your naming clear & consistent. With this workflow action you can update the name of a file(s) on an enrolled record that exists either on a file property or within the attachments section. Naming options allow you to either append text, append the current date, or replace the file name entirely. As with all three of the workflow actions, you also have advanced filter options to further refine which files are updated. Options include filtering by the date the file was created, filtering by the name of the file as it originally was before the naming update, filtering by the source of the file (ex: manual upload), or filtering by the type of the file (ex: image).
This action allows you to keep files clean within HubSpot, by removing files you don’t want to store in the CRM. The same set of advanced filters allows you to target which files are deleted, with one of the most popular combinations being File Source = Email and File Type = Image. This combo targets the unintended image attachments that are inadvertently logged via HubSpot’s email extension. Those created via the email extension will have a source of “Email” and if it’s an image, that’s commonly a headshot, logo, or some other sort of signature image. When selecting how you want to delete files you’ll see a GDPR Delete option. For teams looking to completely purge all record of someone, the GDPR Delete option can be used to ensure files are completely gone from HubSpot and don’t exist anywhere within the CRM.
Uninstallation
In order to uninstall the File Attachment Automation app, follow the steps provided in this article regarding uninstalling connected apps.
Note: Uninstalling the app will not delete any of your existing data, however, it will impact your ability to use the functionality described above.
Cancellation
If you wish to cancel your subscription, you’ll first need to log-in to your profile within app.growth-operations.com
Then, on the left-hand menu, select Account & Billing.
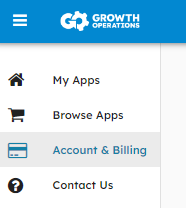
This will bring you to where you can cancel your subscription.

Support
For any additional inquiries or feature requests, please submit your feedback to info@growthoperationsco.com