
Overview
-
Create marketing events from the app setting page
-
Update the registration status of contacts for those events in a Contact Workflow
Prerequisites
Before proceeding, make sure you have signed up for a Growth Operations account here.
Installation
You can install the app by visiting app.growth-operations.com, selecting the integrations tab, clicking “Add a new integration”, and then the install button:

Installing the app will automatically sign you up for a 14-day trial of the standard plan, which includes all features of the app. Next step is authorizing HubSpot.
Authorization
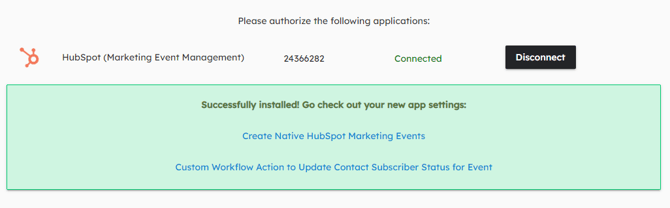
On the authorization screen, click the “Connect” button to authorize HubSpot.

This will take you to hubspot.com to select your desired portal to connect to and to approve the necessary permissions.
Once you are connected, the installation is complete! You’ll be automatically signed up for a 14-day free trial.
Configuration
You can find the configuration options for the app on the settings page:
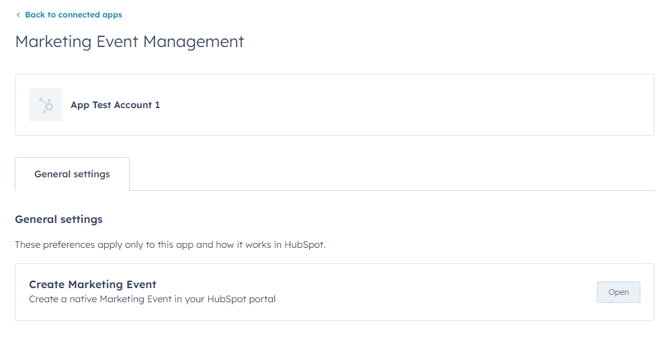
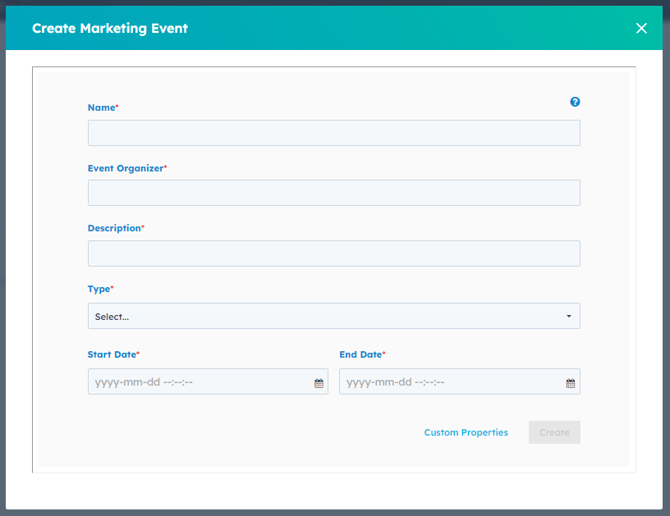
This allows you to create marketing events in your HubSpot portal directly:
-
In order to create a Marketing Event, certain fields are required (denoted by the red asterisk * symbol)
-
As an optional step, users can populate any custom Marketing Event properties by selecting the “Custom Properties” hyperlink
Usage
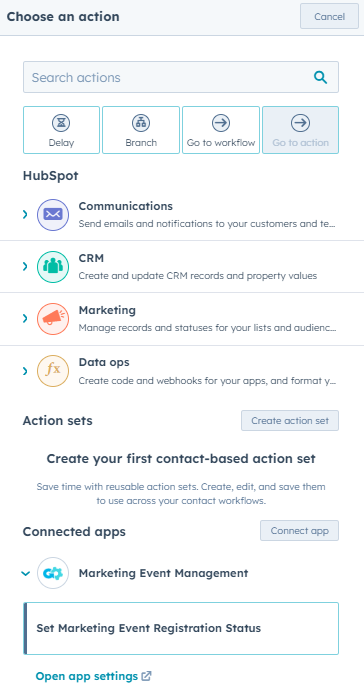
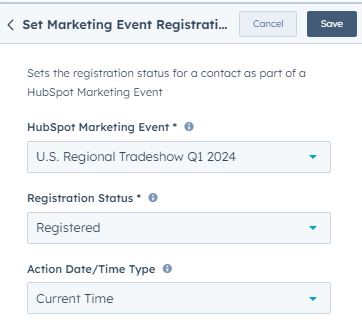
You can now add a custom workflow action to update the registration status of a contact:
-
The HubSpot Marketing Event drop-down will return all of the Marketing Events created via the app settings (see “Configuration”)
-
Registration status options are “Registered” / “Attended” / “Canceled”
-
Action Date/Time Type is optional; If not selected, the fallback option is to use the “Current Time” which is explained below:
- Current Time will set a registration status timestamp at the day/time a record enrolls into the workflow action
- Static Value will return a date picker and time input fields, so you can customize a set static date/time for when the registration status update occurred
- The property option allows a contact property containing the relevant date/time to be used for the purpose of setting the registration status timestamp
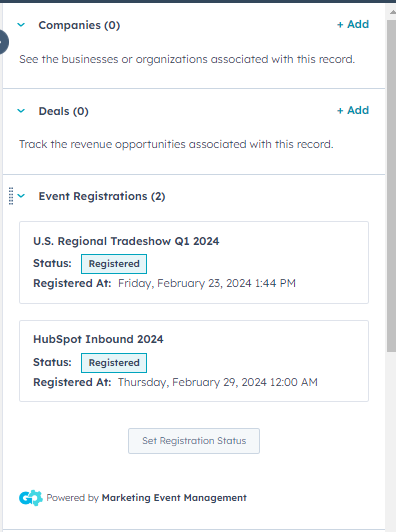
Registration status updates can also be made on an individual basis on a contact record inside the HubSpot CRM.
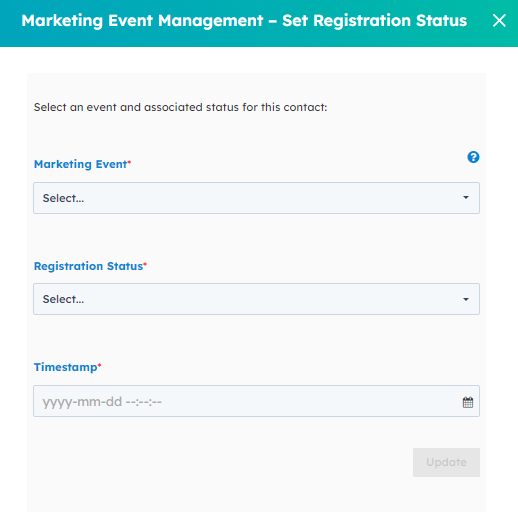
An Event Registrations card will reveal any Marketing Event registrations. Using the “Set Registration Status” button, a user can then input an individual registration status update for that contact record.
Uninstallation
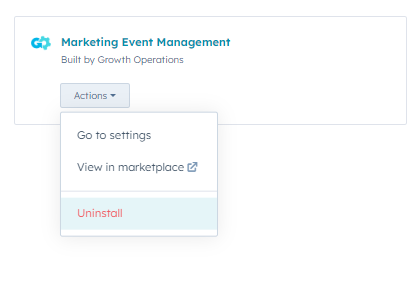
In order to uninstall the Marketing Event Management app, follow the steps provided in this article regarding uninstalling connected apps.
Note: Uninstalling the app will not delete any of your existing data, however, it will impact your ability to use the functionality described above.
Cancellation
If you wish to cancel your subscription, you’ll first need to log-in to your profile within app.growth-operations.com
Then, go to integrations on the left-hand menu, to find your list of apps.
Go to Marketing Event Management and hit the actions drop-down.
At the top, select Manage Subscription.

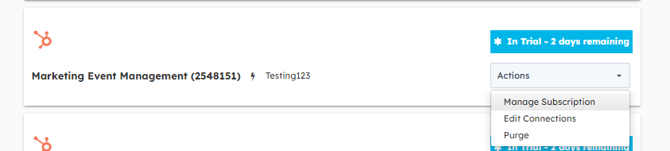
This will bring you to where you can cancel your subscription.

Support
For any additional inquiries or feature requests, please submit your feedback to info@growthoperationsco.com